
Kingston FURY Beast RGB – The New Better Looking Old Kid on the Block
Today I’m taking a look at a 64GB kit of Kingston FURY Beast RGB DDR4-3600 CL18 (18-22-22) performance memory — while testing it at both 32GB and 64GB capacities (more on that later). The Kingston Fury Beast is part of a newly refreshed look from the previous line of Kingston HyperX Fury branded memory with the addition of some new memory modules, which account for a total of two UDIMM memory revisions, Kingston FURY Beast (the more cost-effective upgrade), Kingston FURY Renegade (higher speeds and lower timings) and their RGB variants.
Contents:
FURY Beast Overview | Memory Specifications | Test Setup | Unboxing | Installation | Customizing RGB Lighting | Benchmarks (PC/Games/Multitask Test) | 64GB or 32GB? | Summary

Newbs TLDR: In a rush? The Kingston Fury Beast RGB is the perfect kit of memory for gamers looking for a Plug and Play memory kit with just enough playroom and eye-popping RGB style that would be the perfect addition to any gaming enthusiast’s PC build.
At the time of this article 32GB (16Gbx2) Kingston Beast RGB DDR4-3600 is only $10 more than the black version at $203.99 on the Kingston Online Shop, so simply go with what you’d prefer (RGB or no RGB), and if you want to save $25, you could get away with the lower frequency DDR4-3000 kit instead and overclock it up.
With the Kingston FURY transition, there is a heavy focus on leveraging their gaming brand. One might think that PC memory is just PC memory and that gaming memory is just a plain ol’ marketing gimmick to trick you into paying a bit more for what another cheaper alternative could easily do the same.
Every PC needs it, and every PC needs it for the same reason. So this is an interesting question to ask, as just about 5 years ago, you couldn’t even find any RGB memory modules on the market for example. And the main differentiating preference in your memory may have been the color of your memory’s heat spreaders.
Kingston states it perfectly when explaining what is Kingston FURY in their FAQ and in the press release from HP where HP announced their acquisition of the Kingston gaming brand Hyper X and re-branded the previous lineup of HyperX memory as Kingston FURY, while stating “Kingston FURY is the next generation of this quality engineering in performance memory and storage solutions for PC enthusiasts, gamers, and content creators.”
I like that statement, in that they are focussing their efforts on a very niche group of individuals, and what gaming memory means to Kingston FURY is that it’s a mixture of performance and style.
Gamers and PC enthusiasts want hardware that’s both flexible in order to tune it to their performance preferences while having fun doing so — and gamers and content creators these days consider hardware a part of their overall style.
Kingston also states that the new FURY lineup press release that is for those who want cutting edge performance that allows you the crank up your framerate, keep your streams broadcasting smoothly and plow through your highlight reel” — which takes us to our tests.
Today I’m going to take this Kingston FURY Beast kit for a ride and see how it holds up in a suite of games and benchmarks to see how it performs with a bit of overclocking. As well, take a quick look at whether a 32GB or 64GB kit might be right for you, even taking into consideration the content creation side (such as video editing) and whether that makes a difference as well.
Kingston Fury Beast RGB DDR4 CL18 Specifications
The kit I was given to play with was under the model number KF436C18BBAK2/64, which is a 64GB kit with four sticks of 16GB DDR403600 CL18 288-Pin memory.
This is the perfect kit for my system, as the system I’m testing on is a Ryzen 3000 series, which works perfectly generally with a 3600 Mhz memory speeds alongside its infinity fabric running best at max 1800MHz in a 1:1 ratio with memory speeds, which means 3600Mhz is the sweet spot.
Each memory module kit also supports Intel Extreme Memory Profiles (XMP) and Ready for Ryzen — which is how I approached overclocking today with some of its ready-made profiles. we’ll get to that shortly.
This particular kit is tested by Kingston to run at DDR4-3600 at a low latency of 18-22-22 at 1.35V – so one of my goals through this article is to see how much play I can get with my hardware, to first see if we can, and secondly see if it makes a difference in overall PC performance.
This should give you a general overview of the memory kits details, however, if you do want to get really specific in terms of the nitty-gritty specifications like Row Cycle Time etc, the Memory Modules Specifications page from Kingston does a great job explaining.
My Test Setup
To test out the FURY Beast memory, I’ll be using the following setup:

- CPU: Ryzen 7 3700x
- Cooler; Be Quiet! Pure Loop 360mm
- Motherboard: MSI Tomahawk Max B450
- GPU: AMD RX 5700
- Power Supply: EVGA 650W Supernova
- Case: Corsair 175R
Overall, this is a decent setup to be used as a very mid-range type of build using a Ryzen 3000 series CPU. One thing I’ll be looking into as well is whether or not the excessive amount of memory I have to play with is worth it (up to 64GB) and comparing this to the kit that was already in this build, which was a Crucial Ballistix Max DDR4-4000 clocked to DDR4 3600 CL18. And more importantly, testing what speeds on the Kingston Fury Beast make the biggest difference in gaming and performance, if any. Another note to make is that this setup uses memory in Dual Channel.
Unboxing The Fury Beast RGB
In terms of the casing, and to no surprise the four memory modules came packaged in hard plastic, not unlike any other memory kits I’ve ever received, so no surprises there. The case was wrapped with a “Kingston FURY” branded black sticker that sealed two individual memory kits together (16GB for each module for 32GB in each package in total).
All I had to do is cut the packaged sticker with a knife and the package easily slipped open, which was nice as I didn’t have to cut into any of the hard plastic.
Inside the hard plastic casing were the memory modules, an installation and warranty guide and a Kingston FURY sticker.


Installing the Kingston FURY Beast RGB Memory – Plug N Play Installation
Kingston does state that the FURY Beast is ready for some Plug N Play overclocking up to 2666Mhz, and they aren’t lying.

In terms of installation, it’s as easy as any RAM. I plugged two sticks each 16GB into my motherboard each with a click* click* in their respective slots, booted up the PC and within seconds the sticks of memory were blazing with RGB glory and syncing through a mystical color sequence without needing any sort of activation.
Upon booting up, I opened CPU-Z to check that the memory was reading properly and there is was DDR4-2666MHz without any issues.
What I then did was boot into my BIOS and go to activate my A-XMP profiles, however, only the #1 worked properly booting into DDR4-3600 CL18, while the #2 XMP profile also booted into DDR4-3600 CL18, whereas it should have loaded into the BIOS as DDR4-3000 CL 16 – but since I’m using a Ryzen 3000 CPU this is to be expected. This wasn’t an issue though, as I was easily able to manually select which profile I wanted to use anyhow on my Tomahawk Max motherboard.
Customizing RGB Lighting on the Kingston Fury Beast
Ok, I wouldn’t say I’m typically a swagger type of builder, but the RGB lighting on the FURY Beast is stunning. Upon first installing the memory, it cycles steadily through an RGB cycle of Reds, Greens, Oranges, Purples and Blues that look deep and pleasing. I’d recently take out my AMD Wraith Prism Cooler which is fully RGB as well, and am debating putting it back just to see how the memory compliments it, but I digress.
Kingston states that the customizable RGB is compatible with all the major software like MSI Mystic Light, ASUS Aura sync, AsRock, RGB Fusion from Gigabyte and even has its own software called Fury CTRL (currently in Beta). I reached out to Kingston and they commented that Fury CTRL should be available within a few weeks of writing this.
What I do have though, is MSI Dragon Centre, which includes MSI Mystic Light as I’m using an MSI Tomahawk Max motherboard during this test.
Booting up Mystic Light, I immediately see the memory is seen and shown and ready for customizing its RGB lighting. And using the built-in pre-sets I was easily able to select exactly what effect or color I wanted the memory sticks to show. II quite like the default rainbow type effect that the FURY Beast kits emit upon first loading up, but if you were looking to match your RGB kit to some current lighting setup you have, it is easily done here.
The built-in presets that Mystic light has are decent, but do miss some intuitive features, such as adaptively syncing colours to music or other audio, or perhaps the colours on your screen for that ambient sort of effect — but this isn’t a huge deal.
Overall, I absolutely love the colors on the FURY Beast kit, as they are soft and very pleasing to look at and easily controlled with most software available — I would be curious to look at the Fury CTRL once its officially available for download.

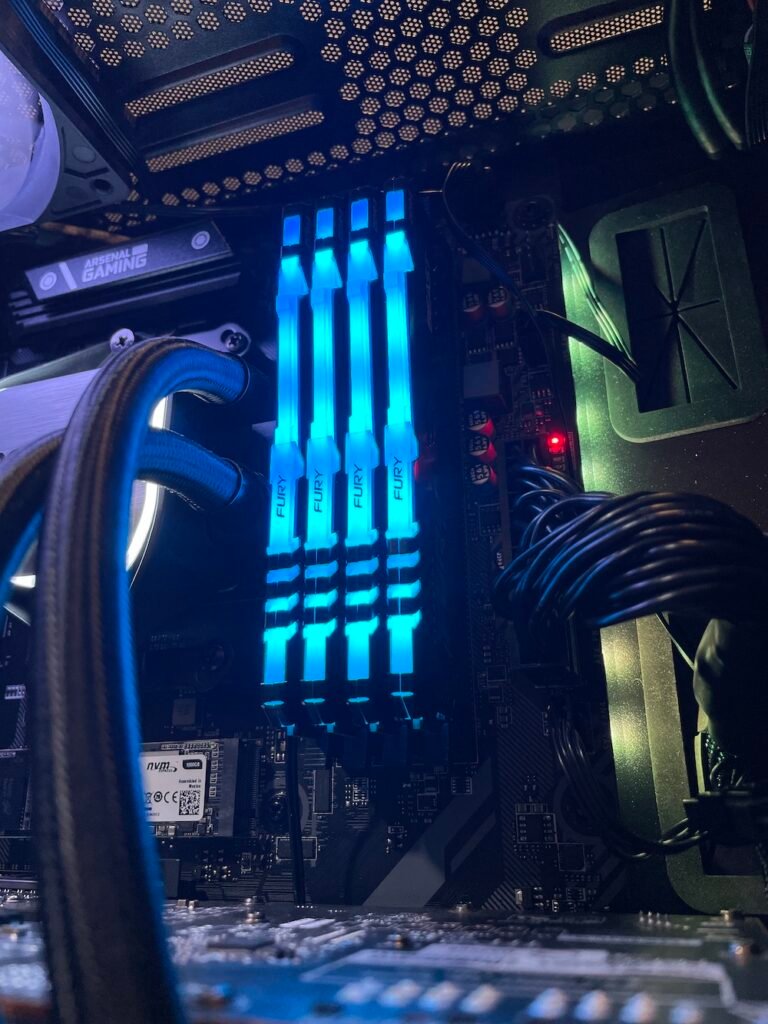
FURY Beast RGB – Blue 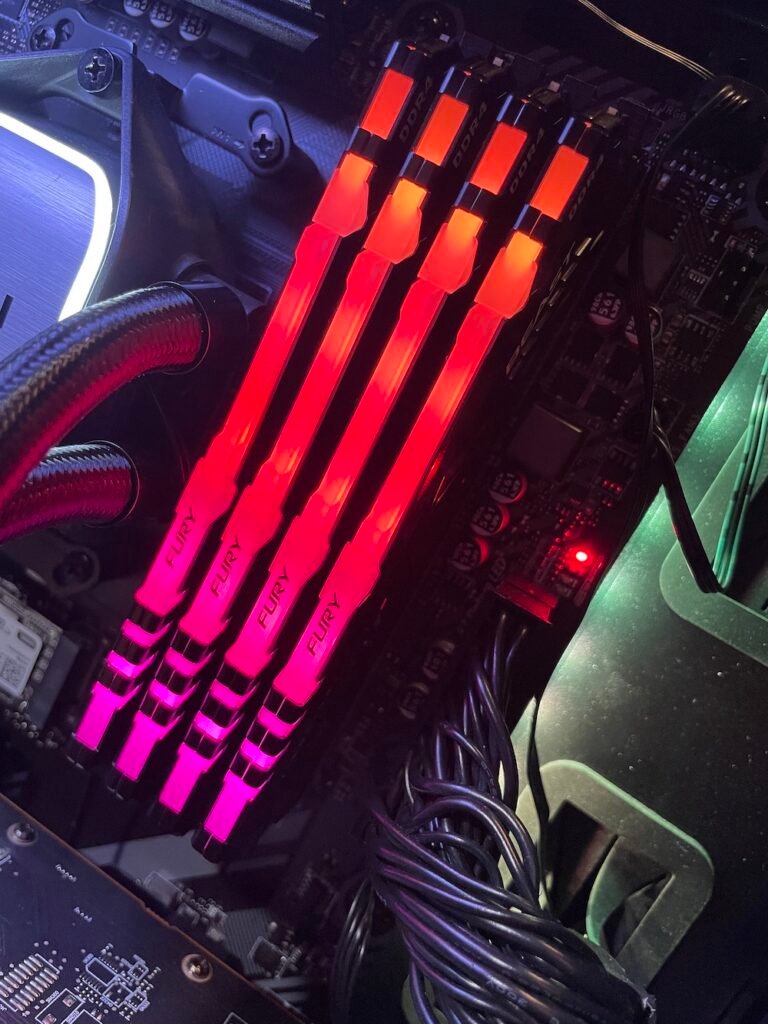
FURY Beast RGB – Red / Pink 
FURY Beast RGB – Green 
FURY Beast RGB – Purple


Benchmarking and Testing the Kingston FURY Beast RGB Kit
Testing Methodology
Now, this is where it gets fun because I ran this kit through a number of tests, which include some synthetic benchmark software, as well as some PC games at both 1080p and 1440p at various, overclocks on the FURY Beast. The main goal here is to see if the memory actually performs, lives up to the expected performance, and whether it matters for gaming.
With each overclock I used MemTest to check for stability and was able to loosely get it up to 4000MHz at CL 18, which I was rather surprised, and I was also surprised that this actually worked pretty well. And each time memory was checked with CPU-Z to determine if the overclock worked and what the timings were.
The following were all speeds tested on the kit and the capacities tested:
- 32GB Kingston Fury Beast DDR4-4000 CL18
- 32GB Kingston Fury Beast DDR4-3800 CL18
- 32GB Kingston Fury Beast DDR4-3600 CL16
- 32GB Kingston Fury Beast DDR4-3600 CL18
- 64GB Kingston Fury Beast DDR4-3600 CL16
- 16 GB Crucial Elite DDR4-3600 CL18
You’ll see above that I also added in a kit of high-end Crucial Elite DDR4-4000 clocked to DDR4-3600 CL 18 for comparison, however at a lower capacity of 16GB, as this is all I had in this kit, however as we may find — gaming doesn’t typically require a ton of available memory. The theory is that you may actually find use in more available memory if you do everything from gaming, streaming and content creation — which is what Kingston Fury is technically targeting.
The main purpose here is to actually showcase the flexibility of the FURY Beast and how it may affect overall pc performance, followed by gaming.
PC Benchmarking Software Results for the Kingston FURY Beast RGB
Cinebench R23 (Multicore Test)
Cinebench is a great way to evaluate real-world test results of all PC hardware using a unique image-rendering process that maxes out all CPU cores and is generally an overall great benchmark for “real-world” benchmarks. At the time of writing this the most recent release is Cinebench R23, which is what I used.
Below you’ll notice that the highest-scoring memory speed on the FURY Beast kit was DDR4-4000 CL18 — which was the highest I was able to overclock this kit stable on my B450 motherboard. This is rather surprising as typically in a Ryzen 3000 system, I’ve found previously that DDR4-3600 outperformed most speeds tested, especially while using FCLK at a 1:1 ratio (or 1800MHz).
- Winning Memory: 32GB Kingston FURY Beast DDR4-4000 CL18
- Close Second: 32GB Kingston FURY Beast DDR4-3600 CL18
3D Mark Time Spy (Combined Score)
3D Mark Time Spy is another general PC benchmarking suite for overall PC performance. It is a DirectX 12 benchmark test for gaming PCs that typically is used to test a combined CPU and GPU performance alike to gaming.
Below you’ll notice that the highest-scoring memory speed on the 32GB FURY Beast kit was DDR4-3600 CL16 — which is essentially the speed this Kingston FURY Beast RGB kit is meant for at 3600MHz, but with tighter timings at CL16. To me this isn’t surprising and what I would have expected, and is good to know since I was able to tighten the timings on this kit in order to get these results.
The close seconds (which were pretty much tied) to no surprise are the 32GB FURY Beast kit DDR4-3600 CL18 and the 64GB FURY Beast kit DDR4-3600 CL16.
- Winning Memory: 32GB FURY Beast kit was DDR4-3600 CL16
- Close Second: 32GB FURY Beast kit DDR4-3600 CL18 and the 64GB FURY Beast kit DDR4-3600 CL16

AIDA64 Read and Write Tests
AIDA64 is a fantastic PC diagnostic and benchmarking tool that includes both CPU and memory benchmarks. Giving it a run, I took the Read and Write speeds tested on the FDURY Beast Kit, to see whether Read and Write speeds were affected.
Below you’ll notice that the highest-scoring memory speed in terms of WRITE Speeds was technically my kit of 16GB Crucial Elite DDR4-3600 CL18, however, followed by a very close 32GB FURY Beast kit was DDR4-3600 CL16 and 32GB FURY Beast kit was DDR4-3600 CL18 respectfully. What this tells me is that purely from a memory perspective, the fastest write times would be a solid 3600MHz.
In terms of READ Speeds, the number one winner, in this case, was the tighter timing 32GB FURY Beast kit was DDR4-3600 CL16, followed close by the 16GB Crucial Elite DDR4-3600 CL18 and 32GB FURY Beast kit was DDR4-3600 CL18 respectfully.
- Winning Memory: Any of 32GB FURY Beast at DDR4-3600 CL16 or CL 18 or 16GB Crucial Elite DDR4 CL8 (so essentially memory clocked at 3600MHz).
PC Game Benchmarks for the Kingston FURY Beast RGB
Now to test whether or not any of the memory speeds or capacities had any effect on gaming, I selected a variety of games to test at both 1080p and 1440p. For each game, I used the built-in benchmarks in order to get the most effective results and simply measure average FPS. The included in the tests are:
- Shadow of the Tomb Raider – DX12 TAA (1080p, Highest)
- Shadow of the Tomb Raider – DX12 TAA (1440p, Highest)
- Grand Theft Auto V -DX11, FXAA (1080p Ultra)
- Grand Theft Auto V -DX11, FXAA (1440p Ultra)
- Ghost Recon Wildlands (1080p, Ultra)
- Ghost Recon Wildlands (1440p, Ultra)
Shadow of the Tomb Raider
Shadow of the Tomb Raider has a built-in benchmark, which I used for this (and every other gamer tested) in order to get the most accurate results. For each test, settings were set to DX11 with TAA and at the highest settings.
Shadow of the Tomb Raider – DX12 TAA (1440p, Highest)
At 1440P, FPS between all tests varied by a maximum 8FPS difference, which is fairly significant. The lowest-performing memory in this test was actually the 16GB kit of Crucial Elite DDR4-3600, which to me was interesting. While I didn’t track consistent memory usage throughout the benchmark, one could assume more memory in this test actually helped a smidge.
The highest performance memory, on the other hand, was 32GB Kingston FURY Beast DDR4-4000 at 60FPS, which was the highest overclock used.
Winning memory: 32GB Kingston Fury Beast DDR4-4000 CL18
Shadow of the Tomb Raider – DX12 TAA (1080p, Highest)
At 1080P, FPS was a bit stagnant, and I may even say strange. I didn’t have V-Sync or any FPS limiters on, but the results were pretty much 100FPS across the board, with the exception of 1 FPS less on the 16GB Kit of Crucial DDR4-3600 and 64GB Kingston Fury at DDR4-3600. So I would say memory at 1080p had very little effect in my test setup here.
Winning memory: All of them!
Grand Theft Auto V
Grand Theft Auto V has a built-in benchmark test, which is what was used here. Tests were done in both 1080p and 1440p with all settings set to Ultra, including advanced settings — with the exception of Extended Distance Scaling and Extended Shadows Distance (this is because I forgot to crank these up and kept them down for consistency).


Grand Theft Auto V -DX11, FXAA (1440p Ultra)
At 1440P, FPS varied by a maximum of 2.25 FPS, which if you look further below in the 1080p benchmarks, is roughly around the same for 1080p. but the results here were a bit more clear in that all of the 3600MHz seems to result in the exact same FPS on the Kingston FURY Kits.
Winning memory: 32GB and 64GB Kingston Fury Beast DDR4-3600 CL18 and CL16
Grand Theft Auto V -DX11, FXAA (1080p Ultra)
At 1080P, FPS varied by a maximum of 2.73 FPS between all tests. Overall, your memory speeds probably don’t matter too much for 1080p GTA V, but overall the best performing was actually the 16GB Crucial Elite DDR4-3600 CL18 followed by 32GB Kingston Fury Beast DDR4-3800 CL18, which was different than other tests. But again, the results are so insignificant here.
Winning memory: All of them!
Ghost Recon Wildlands
Ghost Recon Wildlands has a built-in benchmark as well that was used and is the most strenuous game tested here. All settings were cranked to ultra.
Ghost Recon Wildlands (1440p, Ultra)
At 1440P, FPS varied by a maximum of 1.167 FPS between all memory and setting variations. This is highly insignificant, so I would straight up say there was no significance gleamed here in terms of which would perform better. Also to note, it wouldn’t matter whether you were using 16GB, 32GB or 64GB.
Winning memory: All of them!
Ghost Recon Wildlands (1080p, Ultra)
At 1080P, FPS varied by a maximum of 3.07 FPS, which is a tad more significant than at 1440p. And what is interesting is that technically, the Kingston Fury Beast performed the worst at DDR4-3600 CL16, whereas the Crucial Elite DDR4-3600 or Kingston Fury Beast DDR4-4000 performed best — but again to not a huge significance.
Winning memory: All of them!
Final Tests: 32GB or 64GB of Kingston FURY Beast RGB?
Since I had a 64GB kit of Kingston FURY Beast (4x 16GB), I wanted to see whether it made practical sense for a gamer and content creator type to even need 64GB of memory. I already know that 64GB is way more than myself or most gamers could possibly take advantage of, but is this true.
To do this I thought first I would attempt a high resolution 4K 30FPS video export and compare using 32GB of Kingston Fury Beast running at DDR4-3600 versus 64GB running at the same DDR4-3600. All I did was compile some 4K stock footage in a series that added up to 10 minutes and did an export using HitFilm express video editing software.
Video Render Test: Hitfilm 4K 10 Minute Video Export at 30FPS Test
Here are the results of the 4K 10-minute video export using Hit Film express using 32GB versus 64GB of Kingston FURY Beast memory.
There was a 30-second difference in rendering time, and surprisingly the 32GB actually came out ahead. This wasn’t surprising as looking at memory usage while exporting actually sat at something like 14-15 GB of usage, so not even hitting 16GB. So one could conclude that a minimum of 16GB would be needed in this instance, or 32GB for safe measure.
My other takeaway is maybe if you were to have a higher FPS 4K video to edit end export with many effects using something like After Effects or Adobe Premiere — however that’s past the scope of this review.
Real World Multi-Tasking Test — Simultaneously Running Games and Content Creator Tools
The final test I did was an informal multi-tasking test using multiple software all operating at once. To do this test I literally had a PC game running, was exporting 4K footage, had my music play running and more. Here’s what I had open and operating to mimic a loose look at what I personally may have running at once if I was going full tilt:
PC Game: Warzone running in the background
Blizzard and Steam Game Clients
Couple Chrome Tabs running Youtube and Newb Computer Build
Spotify for music
Recording using OBS
Rendering 4K video real-time with Hit Film Express
And with all of that running and operating all at once, I was able to push my memory usage to a total of 29.1GB of memory usage.
So if one were to go full tilt with games running, rendering some footage, having browsers open and such, I could easily argue a need for a minimum of 32GB of memory, and if you never ever wanted to worry about usage just in case you hit that juicy 32GB, you could then opt for 64GB.

Summary
The Kingston FURY Beast kit I tested impressed me immensely. Everything from having just enough headroom to have some fun with overclocking that could satisfy a hobby PC gaming enthusiast, to the satisfying vividness of the RGB modules that add a great blend of color I’m sure any gamer could use to complement the style of their setup.
The Kingston FURY Beast lineup is the cost-effective addition to the FURY lineup and is probably the kit that most gamers will consider when building anything from a mid-range gaming pc build to a high-end gaming pc build. And since each of the FURY modules come with the option of purchasing the plan black versus RGB, this also gives gamers choice when catering their pc builds overall style. What I find decently impressive here as well, is that the RGB versions won’t break the bank over top of purchasing the plain black version, which I think gives gamers the real choice is which one to consider.
The memory was as easy to install as any memory modules are, but even more so given the Plug N Play — which may come in handy should a gamer forget to set their XMP or Ryzen Ready memory profiles in their BIOS. Even more so, the RGB works perfectly out of the box and is easily customized using all the standard lighting software. Kingston will have their own proprietary software called FURY CTRL, which is slated to release within a few weeks from the date I’m writing this.
When testing various settings of the Kingston FURY Beast modules at different speeds, it was clear to me that simply running the kit as it was intended on my test setup at DDR4-3600 CL18 would serve any gamer perfectly and is simply done by enabling the Ryzen Ready A-XMP profile and if one wanted to get the most out of the kit, tightening the timings to CL16 is easily done and even pushing it up to DDR4-4000 CL18 is easily done with 32GB on the dual-channel memory setup I was using if ever needed.
You can purchase the Kingston FURY Beast RGB Memory right now at Amazon or directly from the Kingston online shop.