
I would like to introduce to you my latest Gaming PC Build. The following includes a video overview of the hardware used and there is a descriptor on all of the hardware I’ve chosen for this Micro ATX Skylake PC Build. All of the hardware used is linked below for anyone interested in wanting to build this build themselves, while keeping in mind that there is of course a flexibility to what you can include in yours. With that being said if you have any questions or want ideas on additional hardware feel free to leave a comment to start a discussion. I will include a description of each piece of hardware I chose and why I chose this particular piece of hardware so that you know the thinking behind choosing the proper parts for your own build.
This Gaming PC Build is a MicroATX sized build using the compact Corsair Air 240 PC MicroATX PC case. I chose to do a MicroATX build because I wanted to build a compact PC that was versatile enough to be transported around the house depending on where I wanted to game, while also being able to still perform as a high end gaming pc. Particularly, my requirements for a case had to be low enough so that I could both fit it into the media shelf I have in my basement as well under my office desk. So if you are interested in building your very own compact gaming pc build using one of Intel’s newest Skylake cpu’s then check out the information below and let’s get started.
Gaming PC Build Recipe:
| Hardware Link | Price | Image | |
|---|---|---|---|
| Estimated Price: | $ 1212.29 | ||
| Processor | Intel Boxed Core I5-6600K 3.50 GHz, 6 M Processor Cache 6 for LGA 1151 (BX80662I56600K) | $312.79 |  |
| CPU Cooler | Corsair Hydro Series H80i GT Performance Liquid CPU Cooler CW-9060017-WW | $89.99 |  |
| Motherboard | ASUS Z170M-PLUS Micro ATX DDR4 Motherboards | $129.99 |  |
| Graphics Card | Gigabyte AMD R9 390 512 Bit GDDR5 8GB 2xDVI/HDMI/3xDP G1 Gaming Graphics Card GV-R939G1 GAMING-8GD | $319.99 |  |
| RAM | Crucial Ballistix Sport 8GB Kit (4GBx2) DDR4 2400 MT/s (PC4-19200) DIMM 288-Pin Memory BLS2K4G4D240FSA/BLS2C4G4D240FSA | $69.99 | 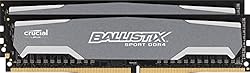 |
| Solid State Drive | SanDisk Internal SSD 240GB 2.5-Inch SDSSDA-240G-G25 | $74.00 |  |
| Power Supply | EVGA SuperNOVA 750 G2 80+ GOLD, 750W ECO Mode Fully Modular NVIDIA SLI and Crossfire Ready 10 Year Warranty Power Supply 220-G2-0750-XR | $119.29 | 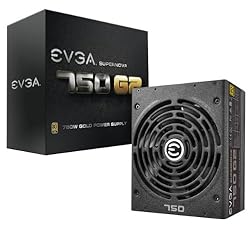 |
| Computer Case | Corsair Carbide Series Air 240 High Airflow MicroATX and Mini-ITX PC Case – White (CC-9011069-WW) | $96.33 |  |
| Optical Drive | None – The Corsair Air 240 Doesn’t Support an Optical Drive |
Overview: Micro ATX Skylake Gaming PC Build ($1200)
CPU: Intel i5 6600K – If you are building a gaming PC, this is probably the top notch cpu to choose these days. Sure you could grab an i7 such as the Skylake Intel i7 6700K, but it will cost you around $100+ or more and will provide little benefit for most games. The Intel i5 6600K has four cores running at 3.5 GHz, but is also very easy to overclock well over 4 GHz. This cpu was a part of Intel’s newest 6th cpu generation, codenamed Skylake.
CPU Cooler: Corsair H80i GT – Since the 6600K cpu actually doesn’t come with a stock cpu cooler, you’ll need a cpu cooler for the build no matter what. The above CPU is an unlocked processor allowing for easy overclocking, so it’s probably also better to purchase a quality cooler capable of keeping those temperatures down. Generally, a Cooler Master Hyper 212 air cooler would have sufficed, however the case chosen for this build doesn’t support more then a 120mm height clearance, so I had to either choose a lower air cooler or go with a liquid cooler. I chose to go with the Corsair H80i GT cooler for that reason, which is an all-in-one liquid cpu cooler with a 120mm radiator and two fans to fit. This cooler also comes with the Corsair Link, which allows you to customize the cooling performance, monitor temperatures and even change the color of the lighting on the cooler itself.
Motherboard: ASUS Z170M – Plus – This is a micro atx sized motherboard, which fits perfect in the included micro atx pc case you can read more about below. This motherboard supports up to 64 GB of DDR4 memory, reversible USB Type-C connectivity and more including – (learn more at asus.com)
- 5X Protection II – Advanced hardware safeguards for all-round protection
- DDR4 memory overclocked to 3466MHz
- Lightning-fast M.2 with PCIe® 3.0 x4 interface
- USB Type-C for convenient connectivity
- Epic gaming audio with noise-isolation design
- Media-acclaimed UEFI BIOS with EZ Flash 3
- Fan Xpert 3 advanced fan controls for ultimate cooling and silent performance
Graphics Card: Gigabyte R9 390 – This is the perfect graphics card for a top, high end gaming pc build for those that want to game smoothly at 1080p and even beyond. This card tends to go hand in hand with the GTX 970 graphics card and if you are going to build this build I’ll leave it up to you which you choose, just look up benchmarks for which what you play. This graphics car has 8Gb memory and it can get a little hot, bit it’s totally worth it.
RAM: Crucial Ballistix Sport *GB (two 4GB sticks) – Well, this isn’t the exact kit I purchased, but for me it was about purchasing the most affordable kit of worthwhile DDR4 RAM totalling 8GB. I do plan on upgrading the kit in the included build to 16GB, which is definitely possible as this build does support up to 64GB – this is using the four ram slots on the included motherboard. The kit included in this build is a kit of two 4Gb sticks of Crucial Ballistix Sport DDR4 Ram.
Solid State Drive: SanDisk SSD Plus 240GB – I chose to purchase a single SSD, since this provides premium performance in terms of read and write times when compared to a standard HDD. 240Gb seemed to be a prime amount of storage for myself, fit Windows 10 just fine with plenty of room for many games. As a caveat, I have a ton of HDD drives already hanging around, so I did also install two separate 1TB HDD drives that I’ll use for media (movies / pictures / music) and software I don’t use as often. The included motherboard supports up to seven sata storage devices, which is plenty for a mico atx motherboard. The case also supports three 3.5 inch drives (such as the HDD drives) and three 3.5 inches drives (SSD’s) inside.
Power Supply: EVGA SuperNOVA 750 G2 – 750 watts is plenty of power for this build, with a minimum requirement of 600 watts to accommodate the R9 390 graphics card. The 750 G2 is currently cheaper then the 650 G2, which just makes more sense given the difference. Should you find this psu more expensive then the 650 watt version, you could get away with that one too. This PSU provides continuous power with an 80 plus gold efficiency rating and an ECO Thermal Control Fan System that offers a zero fan noise on low load operation. Overall this is a great modular high efficiency power supply, that even comes with a pouch to store your extra modular cables that you don’t use.
PC Case: Corsair Air 240 – I absolutely love this case. The Corsair Air 240 is a compact Micro ATX PC case with a cube like shape. You can orient this case any way you want (horizontally or vertically), it has a nice looking side window (or top windows depending on what orientation you use) and there is still so mech space inside for everything you need and a little more. I chose this case not only for its aesthetic appeal, but also because it is a compact case that leaves room for upgrades (including plenty of drive space, two graphics cards and plenty of fans for cooling). The Corsair 240 comes in either white or black, has great air flow and includes three 120mm fan – one of which I took out to make way for the Corsair H80i GT liquid cpu coolers radiator / fans.
Final Words: Build this PC!
So far this PC is running perfectly using Windows 10 and I couldn’t be happier with it. Overall the installation went smoothly and didn’t have any difficulty putting it together. Although, when installing the Corsair H80i GT CPU cooler I did have a few troubles orienting the tubes so that they were low enough that I could slide the side window of the case over top, but with the right twist and a slight push down the side windows slid on just fine. I would recommend this build to most any or average gamers wanting to game maxed out in a set up using a 1920×1080 monitor, and it should run just fine even at 1440p, I just haven’t had a chance to test that yet. If anyone is interested in building a similar build feel free to use the hardware table provided above, or if you have any questions / comments feel free to leave one below.


